Follow the steps below to display and integrate the Clever Space features in CleverOne and EzDent-i.
- Access EzServer Web Console.
(Make sure to log out if OneID is currently signed in through the browser.)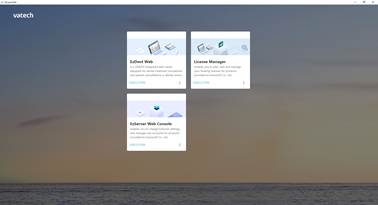
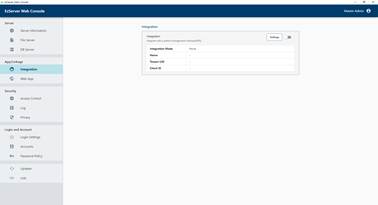
- Go to the [Integration] submenu under [App/Linkage], and then click [Settings].
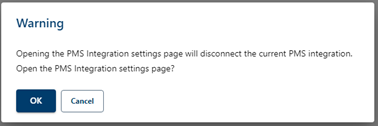
- A warning message appears, indicating that the integration will be temporarily disconnected to open the PMS integration screen. Click [OK] to proceed.
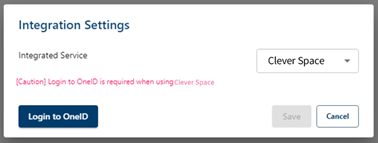
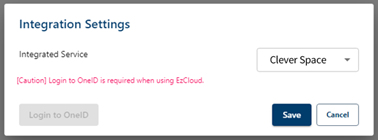
- Select ‘Clever Space’ in the ‘Integrated Service’ field, and then click [Login to OneID].
- When the OneID login browser window opens, enter the account information of the owner to be linked.
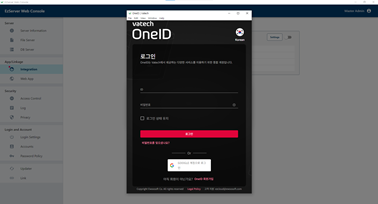
- Once the integration is completed successfully, click [Save] to save the settings.
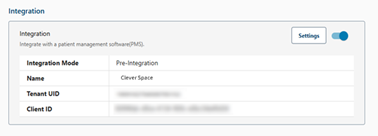
- Once the settings are saved, you can view the integration information, including the tenant UID, as shown in the image below.
- Enable the Clever Space setting option in each application.
- CleverOne v1.0.0 or higher
1) Select [Ξ] icon in the upper-left corner, and then click [Settings].
2) On the [General] tab under [Service], set ‘Clever Space Setting’ to ‘Enable’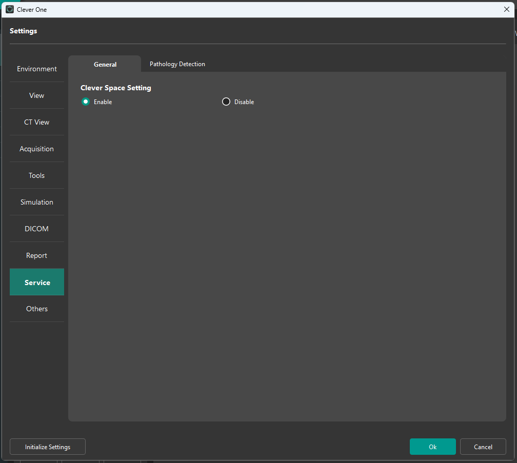
- EzDent-i v3.5.15 or higher
1) Select [Main Menu] in the upper-left corner, and then click [Settings].
2) Under [Clever Space] in [Others], set ‘Clever Space Setting’ to ‘Enable’.
- CleverOne v1.0.0 or higher
- Restart the applications (CleverOne and EzDent-i). The Clever Space button will appear at the top of the screen.

Note
- Only one owner account (organization) can be integrated per EzServer
- Once the owner account is registered, members of the same organization can use the Clever Space service without a separate integration process.
- Make sure to log out of the browser before entering the OneID account information.
Was this article helpful?
That’s Great!
Thank you for your feedback
Sorry! We couldn't be helpful
Thank you for your feedback
Feedback sent
We appreciate your effort and will try to fix the article